




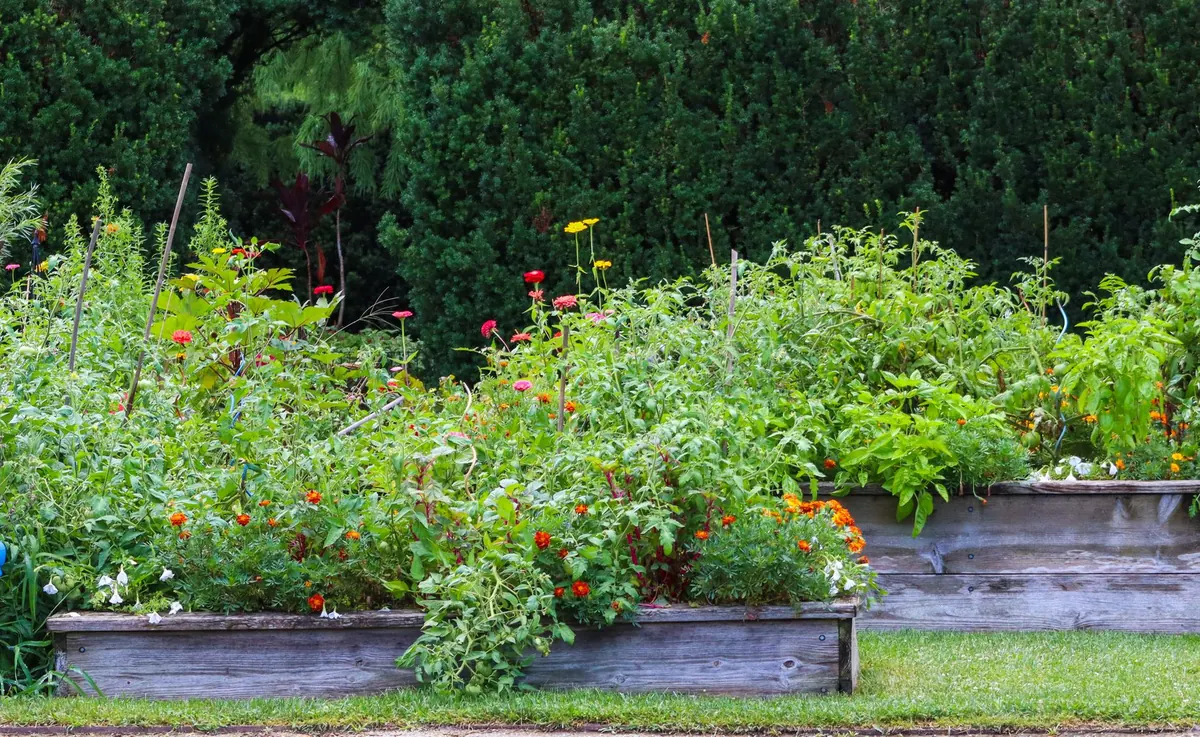
Cedar costs more than pine, and there is a reason gardeners keep buying it. The wood carries natural oils that resist rot and insect attack, so a bed built from it will outlast one made from untreated softwood by a considerable margin — without any chemical treatment you would rather keep away from your carrots. Building one is a weekend job: four boards, four posts, a packet of screws and a bit of care with the levels. Get those details right and you will have a bed that holds its shape, drains properly and earns its keep for years.
Choosing the Right Cedar
Western red cedar is the species most often sold for garden joinery in the UK. It is light, straight-grained and pleasantly aromatic when cut, and it weathers to a soft silver-grey if you leave it bare. Look for boards at least 38mm thick; 50 x 150mm is a good working size, since two courses of 150mm boarding give you a 300mm-deep bed without any fiddly cutting.
Check each board before you buy. Large knots close to the ends will split when you drive a screw through them, and twisted boards are a nuisance to pull square. Cedar is soft and splits easily, so pilot-drill every hole — a 4mm bit for a 75mm screw is about right.
If cedar is out of reach on price, oak, larch or modern pressure-treated timber are all sensible alternatives. Two things to avoid in a bed growing food: old railway sleepers, which can be contaminated with tar and creosote, and any timber treated with creosote or similar heavy-duty preservatives.
Size, Depth and Siting
Work out the dimensions before you cut anything. A bed you cannot comfortably reach into is a bed you will neglect.
- Width: 1.2m maximum if you can walk round both sides; 60–90cm if it sits against a wall or fence.
- Depth: 250–300mm suits salads, herbs, beans, brassicas and most shallow-rooted crops. Go to 400mm or more for carrots, parsnips, maincrop potatoes, or if you are building on paving.
- Length: match your board lengths to save waste — 1.8m or 2.4m are common and easy to handle.
- Light: aim for six hours of sun a day for fruiting crops; leaf crops will manage on less.
- Paths: leave 45–60cm between beds so you can kneel, wheel a barrow and get a mower past.
On open soil, the simplest approach is to leave the base open to the ground. Worms and soil life move in, drainage takes care of itself and the bed behaves like a very well-behaved piece of ground. On concrete or paving, build deeper and make sure water can escape — set the bed on a couple of slim pavers with gaps between the bottom boards, or drill drainage holes if you close the base in.
Tools and Materials
For a 2.4m x 1.2m bed, 300mm deep, you will need:
- Four 2.4m boards at 50 x 150mm, and four 1.2m boards at the same size
- Four corner posts at 75 x 75 x 450mm
- Around 60 exterior-grade screws at 75mm — stainless steel or a coated decking screw
- Optional: woven landscape fabric, a few sheets of cardboard, galvanised mesh for the base
- Tape measure, carpenter's square, spirit level, string line
- Cordless drill with 4mm pilot bit, countersink bit and driver bit
- Hand saw or circular saw, mallet, spade, wheelbarrow, gloves and safety glasses
Building the Frame
- Mark out the footprint. Use a string line or a trickle of sand. Measure both diagonals — when they match, the rectangle is square.
- Strip the ground. Remove turf and perennial weeds, then fork over the subsoil to break up any pan. Rake it roughly level.
- Set the corner posts. Knock each post about 150mm into the soil with a mallet, leaving 300mm standing so the top sits flush with the finished rim. On hard standing, stand the posts on small paving offcuts instead.
- Fix the first course. Screw the two long boards to the posts first, then the short sides. Drill pilot holes 25–40mm in from every board end, and countersink so the heads sit just below the surface.
- Check as you go. After each pair of boards, test for level and square. A 5mm error at the bottom becomes a crooked rim by the top.
- Add the second course. Offset the new screw holes by 40–50mm from the ones below so you are not driving into the same grain.
- Finish up. Run a long level across the rim, adjust, then firm the soil back around the posts.
Lining, Drainage and the Base
Skip the gravel. A layer of stones under fine soil does not improve drainage — water sits at the boundary between the two until the soil above is saturated, so roots end up wetter, not drier. Good drainage comes from a decent soil mix and an open base.
What is worth doing is suppressing weeds. Lay overlapping sheets of plain cardboard across the base, wet them thoroughly and cover them with soil. They smother what is underneath and rot away within a season or two. If voles or moles are a problem, staple galvanised mesh across the base before the cardboard goes down.
A breathable lining against the inside of the boards stops soil washing out through any small gaps and slows the wetting and drying cycle that ages timber. Woven landscape fabric works well; run it up the sides only and never across the base. Avoid sealing the bed with polythene sheeting, which traps moisture against the wood — the opposite of what you want.
Filling the Bed with Soil
Work out the volume first: length x width x depth. A 2.4m x 1.2m bed at 300mm deep needs about 0.86 cubic metres, so order a full cubic metre to allow for settling.
A good general mix is roughly 50–60% decent topsoil, 30–40% well-rotted compost or manure, and a little sharp sand or grit if your topsoil is heavy clay. Fill with pure compost and you will get a bed that shrinks dramatically, dries out fast and pushes soft, sappy growth at the expense of fruit. Fill in 150mm layers, water each one, and firm lightly with the back of a rake — you want it settled, not compressed.
Stop 25–40mm below the rim. That lip holds mulch in place and gives you somewhere for water to sit without running straight off. Leave the bed to settle for a week or two before planting, then top it up to the mark.
Looking After a Cedar Bed
Cedar does not need oiling or staining to survive, though a coat of suitable oil will slow the silvering if you prefer a warmer colour. Never pressure-wash it; the soft surface fibres will lift and the timber will weather faster.
Once a year, check the screws and tighten any that have worked loose, and replace the top board if it starts to split — a single board is far cheaper than a new bed. Top up the soil each spring with 25–50mm of compost before you sow, keep the surface mulched, and rotate your crops between beds to keep pests and diseases guessing. Treat the frame well and it will still be holding soil long after the first few harvests have been forgotten.
Photo: Karen F / Pexels
Related posts
More stories you’ll love reading